6.4 miles (10.2 km) with 103m of total ascent
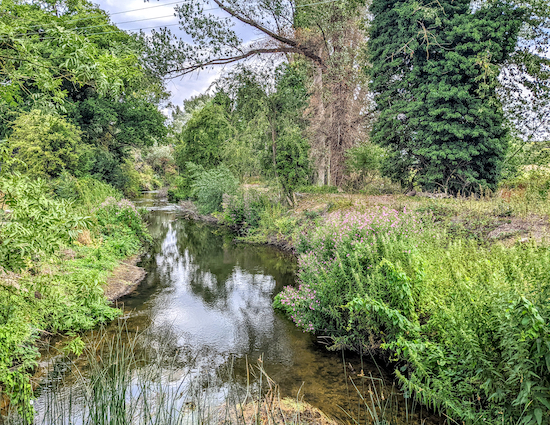 |
| Crossing the River Lea at point 17 in the walk |
This walk from Bayford heads NW to the outskirts of Hertford then returns SW across the River Lea valley. It starts in Bayford with the option of two short detours along the way to visit The Black Horse in Hertford or The White Horse in Hertingfordbury. Please check pub opening hours to avoid disappointment. The start of the walk is 4 miles SSW from Hertford North station by road.
This walk crosses two livestock fields between points 3 and 5. We saw some cows in the first field, but they weren't interested in us. The route also goes along sections of two lanes without pavement for pedestrians; there is a 120m section between points 14 and 15, and a 560m section from point 22 to the end of the walk. There is also a 750m stretch on pedestrian pavement alongside roads on the outskirts of Hertford.
Getting there
There are bus stops close to the start of the walk (location -
https://w3w.co/chef.snack.repay), which are served by the number 308 bus. Alternatively you could join the walk at point 9 on the outskirts of Hertford (location -
https://w3w.co/author.votes.torch) where there are bus stops nearby for the numbers 308, 341, H3 and H4. You can check bus times at
Intalink.
Fly through preview of walk
If you want to check what sort of landscape you will be crossing before you set off on this walk you can view a short 3D video of the route below. It's created using the free version of
Relive.
Directions
 |
Map for Walk 194: Bayford North Loop
Click on the map above for a larger version
Created on Map Hub by Hertfordshire Walker
Elements © Thunderforest © OpenStreetMap contributors
There is an interactive map below the directions |
Those with GPS devices can download
GPX or
KML files for this walk. We've added
What3Words location references for those who use that system. If you print these walks you might want to use the green
PrintFriendly icon at the bottom of these directions to delete elements such as photographs.
1: From the triangle at the junction of Ashendene Road and Brickendon Lane in Bayford (location -
https://w3w.co/green.create.milky), head NE for 50m along a lane called Bayford Green (location -
https://w3w.co/marker.sheep.rather), see image below.
 |
Bayford Green at the start of the walk
|
Continue heading NE along Bayford Green, which is also Bayford
footpath 10, for 295m until you reach a fork (location -
https://w3w.co/soap.wider.aspect), see image below.
 |
| Keep right at the fork, still on Bayford footpath 10 |
2: Keep right at the fork, still on Bayford footpath 10, then continue heading NE for 170m until you reach a footpath on the right (location -
https://w3w.co/globe.blocks.cherry), see image below.
 |
| Turn right on Bayford footpath 1 |
3: Turn right on Bayford footpath 1, then head E for 140m until you reach a metal gate with a footpath gate to the right (location -
https://w3w.co/peanut.paying.regard), see image below.
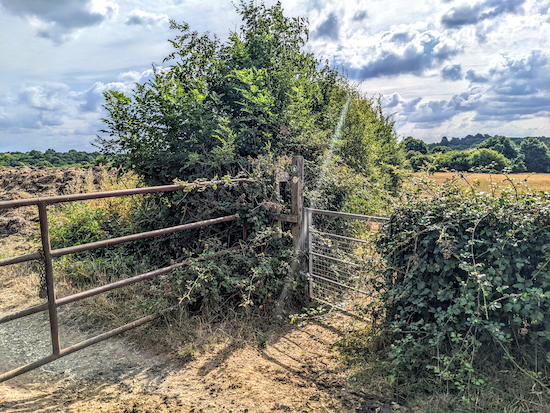 |
| Head E with the hedgerow on the left and field on the right |
4: Go through the gate then head E, still on Bayford footpath 1, with the hedgerow on the left and field on the right for 180m until the path bends left by a metal gate (location -
https://w3w.co/sector.games.serve), see image below.
 |
| Go through the gate then head N |
5: Go through the gate then head N, still on Bayford footpath 1, with the field on the left and the hedgerow and railway on the right, continuing for 750m until the path turns right into the hedgerow (location -
https://w3w.co/towns.improving.played), see image below. This turn is easy to miss. For those with online access use the What3Words reference above.
 |
| Bayford footpath 1 cuts through the hedgerow and crosses a footbridge |
6: Follow Bayford footpath 1 as it turns right, crosses a footbridge, then heads N for 1.2km. (see image of the footpath below).
 |
| Bayford footpath 1 between points 6 & 7 |
It's important to ignore any paths on the left along this stretch. They are not open to the general public. Notices have been posted at various points along the way. They read: "Private land. No unauthorised access. No public right of way".
 |
| One of the signs along Bayford footpath 1 |
Continue heading N along Bayford footpath 1 with the railway on the right and woodland on the left until you reach a footbridge over the railway on the right (location -
https://w3w.co/tummy.lime.shape).
7: Turn right, cross the railway footbridge then cross a small footbridge made up of old railway sleepers, see image below.
 |
| Cross a small footbridge made of old railway sleepers |
Continue heading NE, now on Brickendon Liberty footpath 27 for 250m until the path you are on crosses a parish boundary and continues as Hertford footpath 52 for 340m until you reach Brickendon Lane (location -
https://w3w.co/limit.opens.repair).
* According to a regular user of Hertfordshire Walker, Gerry Gross, there is an option just before you reach Brickendon Lane of turning left through the hedgerow (location - https://w3w.co/trees.teeth.pigs) to reach a quieter road (which is also called Brickendon Lane) where, according to Gerry, there are free parking options for those who prefer to start the walk at point 9.
8: Cross Brickendon Lane then turn left and head NNW for 490m until you reach Hornsmill Road (location -
https://w3w.co/degree.stole.envy). There is a pedestrian pavement along this stretch of Brickendon Lane.
9: Turn right on Hornsmill Road then head NNE for 240m until you reach a small traffic island (location -
https://w3w.co/cheeks.soup.track), see image below. There is a pedestrian pavement along this stretch of Hornsmill Road.
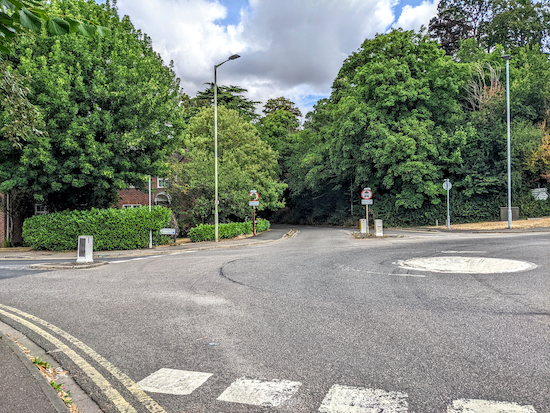 |
| Cross the traffic island then head N along Horns Road |
10: Cross the road at the traffic island then head N along Horns Road for 370m passing allotments on your left and continuing until you reach a track on the left (location -
https://w3w.co/oval.probe.pushes), see image below.
 |
| Turn left on Hertford BOAT 54 |
* At this point you could take a detour to visit The Black Horse, by continuing heading NE for 320m along Horns Road and then West Street until you reach the pub on your right (location - https://w3w.co/hogs.luxury.locked).
11: Turn left on Hertford BOAT 54 (
byway open to all traffic), then head SW and W for 400m, crossing the River Lea via a bridge (location -
https://w3w.co/filer.pulled.vivid) then passing
Hertford Town Football Club on the right (location -
https://w3w.co/hats.truth.ships) and continuing through a gate (location -
https://w3w.co/shops.gave.gift), see image below.
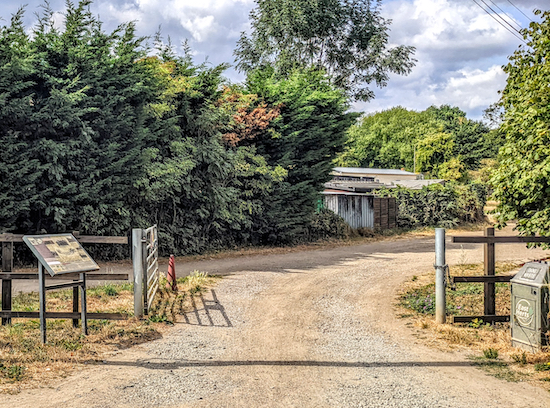 |
| Continue through the gate and on to a railway viaduct |
Continue until you reach a railway viaduct (location -
https://w3w.co/decay.search.bring), see image below.
 |
| Go under the viaduct then head SW on Hertford footpath 55 |
12: Go under the viaduct then continue heading SW, now on Hertford footpath 55, for 80m until you reach the entrance to the Cole Green Way (location -
https://w3w.co/text.shells.lonely), see image below.
 |
| Turn left on Hertford footpath 55 |
Turn left on Hertford footpath 55 immediately before you reach the Cole Green Way then follow the footpath first S then in a westerly direction for 355m until you reach some cottages on the left and a lane (location -
https://w3w.co/crib.stacks.finishing).
13: Continue heading E, now on Hertford BOAT 56, for 570m until you reach St Mary's Lane (location -
https://w3w.co/comic.award.lasts).
* At this point you could take a detour to visit The White Horse in Hertingfordbury by turning right on St Mary's Lane then heading NNW for 470m where you will find the pub on your left (location - https://w3w.co/gravel.defend.save). There is no pedestrian pavement along this stretch of road.
14: Turn left then head S on St Mary's Lane for 150m until you reach a
bridleway on the right (location -
https://w3w.co/rugs.asking.level), see image of bridleway below. There is no pedestrian pavement along this stretch of road.
 |
| Turn right on the Hertford bridleway 57 |
15: Turn right on Hertford bridleway 57 then head SW for 280m at which point you cross the parish boundary and continue heading SW but now on Hertingfordbury bridleway 2. This is a particularly pretty stretch of countryside with open views, through shaded woodland, and alongside meadows rich in wild flowers. See selection of images below.
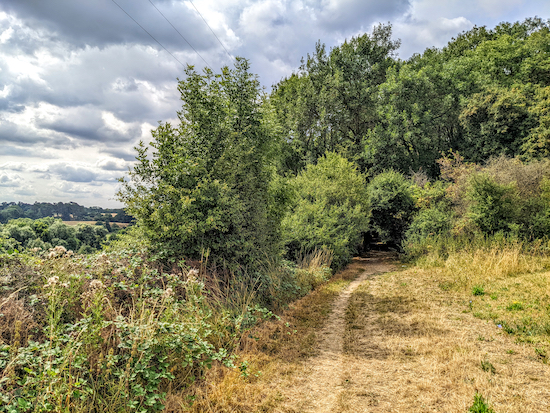 |
| Entering a wooded stretch along Hertingfordbury bridleway 2 |
 |
| Entering the woodland on Hertingfordbury bridleway 2 |
 |
| Chicory alongside Hertingfordbury bridleway 2 |
Follow Hertingfordbury bridleway 2 for 970m to a junction (location -
https://w3w.co/finger.unwanted.each), see image below.
 |
| Turn left at the junction, still on Hertingford bridleway 2 |
* At this point you could take a short detour to visit the remains of the Baroque gardens at Grotto Wood, now overgrown (location - https://w3w.co/bulb.seat.marble). Grotto Wood features in Walk 93 in our collection. To visit Grotto Wood turn right at the junction at point 16 and head NW for 120m.
16: Turn left at the junction, still on Hertingford bridleway 2, then follow it S then SW again for 850m until you reach a bridge over the River Lea on the left (location -
https://w3w.co/sleeps.hatch.punch), see image below.
 |
| Cross the bridge over the River Lea then head S |
17: Cross the River Lea then head S, now on Little Berkhamsted bridleway 25, for 155m until you reach the Lower Hatfield Road (location -
https://w3w.co/wrong.liner.daring), see image below.
 |
| Cross the Lower Hatfield Road then take Little Berkhamsted bridleway 21 |
18: Cross the Lower Hatfield Road then take the track on the other side, Little Berkhamsted bridleway 21, then head SSE for 400m to a junction (location -
https://w3w.co/blend.topic.cheek), see image below. This is a particularly pretty stretch of the walk.
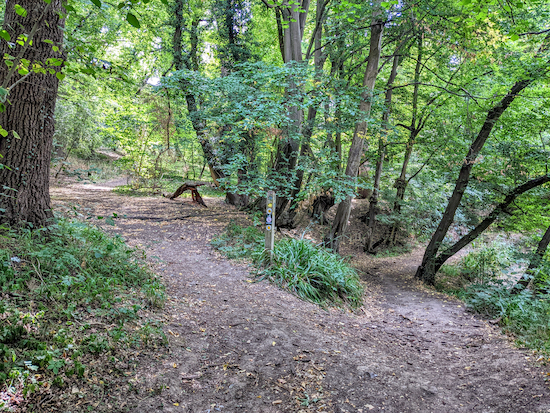 |
| Turn left on Bayford footpath 4 then head uphill |
19: Turn left on Bayford footpath 4 then head SE uphill and through woodland. Another lovely stretch of the walk. After 190m you will reach a fork in the path (location -
https://w3w.co/sprint.pool.item), see image below.
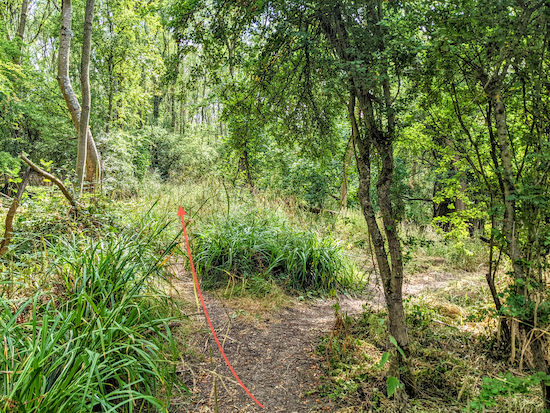 |
| Keep straight avoiding the fork to the right - see orange arrow |
Keep to the left at the fork heading straight along an overgrown section of the footpath for 270m until you reach a field (location -
https://w3w.co/bond.fluid.resist), see image below.
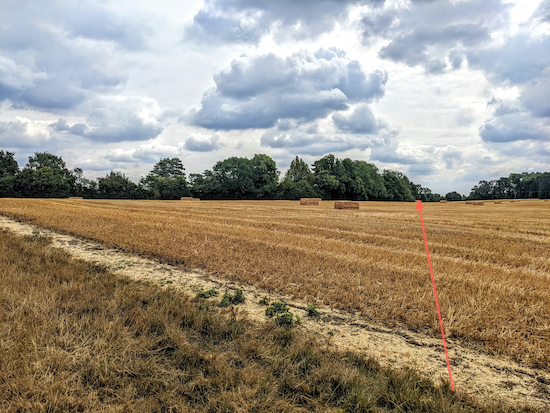 |
| Bayford footpath 4 crosses a field |
20: At this point Bayford footpath 4 crosses a field, but when we tested this route on 28 July 2022 the path had not been reinstated after the crop had been harvested, so we kept left and walked round the edge of the field with the hedgerow on the left and the field on the right until we rejoined Bayford footpath 4 on the far side of the field (location -
https://w3w.co/transmitted.comical.dimes), see map below.
 |
Detour round edge of field in orange
Image source: Esri, DigitalGlobe, GeoEye, Earthstar Geographics,
CNES/Airbus DS, USDA, USGS, AEX, Getmapping, Aerogrid,
IGN, IGP, swisstopo, and the GIS User Community |
Follow Bayford footpath 4 SE, with the hedgerow on the left and the field on the right, until you reach a left turn (location -
https://w3w.co/toxic.fairly.exile), see image below.
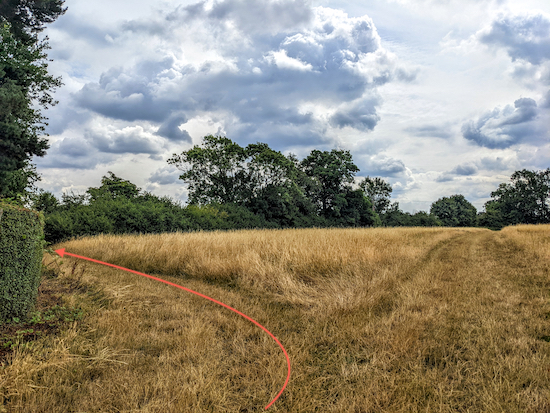 |
| Turn left, still on Bayford footpath 4, then head E to Bayford Lane |
Turn left, still on Bayford footpath 4, then head E for 260m to Bayford Lane (location -
https://w3w.co/lamp.proper.runs).
21: Turn right on Bayford Lane and head first S then E then SE for 500m back to Bayford village and the starting point. There is no pedestrian pavement along this stretch of Bayford Lane.
A big thanks to our friends Debbie and Sam who recommended we try the footpaths between points 1 and 7. I then took on the challenge to create a loop using public rights of way.
Interactive map


At point 16 if you turn right you could have a short detour around Grotto Wood, featured on another of your walks, number 93 I think
ReplyDeleteGreat idea. I have edited the directions to include that suggestion. Thanks. Dave
DeleteHi Dave you done it again lovely walk. Between points 3/4 hedgerow just a mass of ripe blackberries as for the woods at 19/20 huge Fir and Oak trees it was so peaceful there . Walked Topped of with a great pint at the Baker Arms . Thank You. .IR.
ReplyDeleteHi Ian, yes, a lovely walk. Worth putting up with the short section through housing for the nice bits. Dave
DeleteThis was a lovely post-Christmas walk. Thank you for such comprehensive directions. Some muddy patches to negotiate after a lot of rain -
ReplyDeletewalking poles very useful. Sadly The Baker Arms is closed, at the moment at least.
Hi Lesley, glad you enjoyed the walk, despite the seasonal mud. And yes, it's a pity the Baker Arms is currently closed. I used to have it listed on several of our walks. If you haven't already done so please consider joining our friendly Facebook group where fellow walkers are posting about their walking experiences and sharing photographs. David
Deletehttps://www.facebook.com/groups/hertfordshirewalker
I started this walk in Brickendon Lane (just after point 8 at W3W ///maps.cars.ground) , plenty of free parking is very easy along this road, you can walk up it to point 9, much nicer than using the parallel road of the same name as that is a main road! Also, at point 4 to 5 the cattle very interested in me as I was about to go through the gate, they all came and blocked my way! My unofficial detour was to climb through (not over!) the gate on the left, turn immediately right walking along the edge of the field , meeting up with the path literally just after the gate at point 5 and avoiding those cattle! Also, at point 20 the farmer has still not reinstated the path across the ploughed field, so I went around the edge which was quite easy and got no mud on my boots!
ReplyDeleteThanks for the Brickendon Lane tip, Gerry.
Delete