This walk follows secluded footpaths through deep, ancient woodland, crosses arable fields, winds along tree-lined byways, then follows Ermine Street, a Roman road. You will walk through three nature reserves, Balls Wood, Danemead, and Broxbourne Wood. A warning before you set off, this route can be extremely muddy in several places after rain, so it's probably best to save it for dry weather. If you try it when it's wet you might want to wear wellies.
If you want to check what sort of landscape you will be crossing before you set off on this walk you can view a short 3D video of the route below. It's created using the free version of
files for this walk. We've added
location references for those who use that system. If you print these walks you might want to use the green
icon at the bottom of these directions to delete elements such as photographs.
). Be careful to make sure you use this car park because there is a private car park immediately before it to the SW (location -
). When we updated these directions in February 2024 it was free-of-charge. Check this hasn't changed before leaving your car.
 |
| From the car park take Brickendon Liberty restricted byway 24 |
1: From the car park take Brickendon Liberty
restricted byway 24 which is a clear track that leads out of the car park into woodland, see image above. Head N for 215m until you reach a gate on the left leading into
Danemead Nature reserve (location -
https://w3w.co/punks.guises.sands). see image below.
 |
| Enter the nature reserve then head NW |
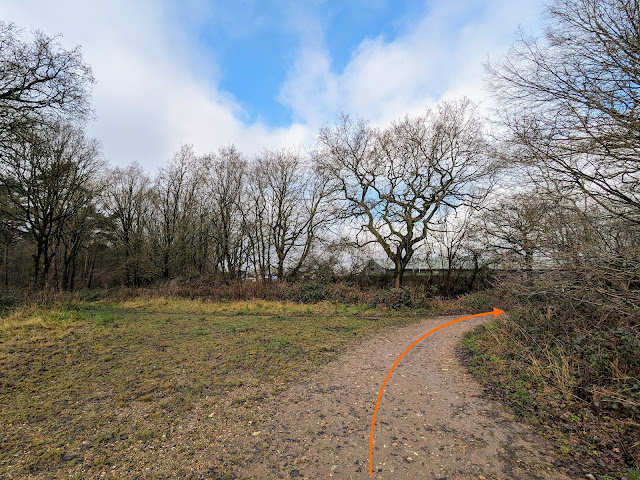
2: Enter the nature reserve then head NW for 130m across an open space, see direction of orange arrow on the image below.
 |
| Cross the open space heading NW |
 |
| An information board at the entrance to Danemead Nature Reserve |
Once the path enters the woodland follow it as it weaves its way in a westerly direction for 200m until you reach a gate (location -
https://w3w.co/melt.beam.candy) see image below. This section can be muddy after rain.
 |
| Go through the gate then continue along the path |
3: Go through the gate then continue along the path, now heading in a north-westerly direction for 150m until you reach Spital Brook (location -
https://w3w.co/brave.smug.tamed), see image below.
 |
| When you reach Spital Brook keep left |
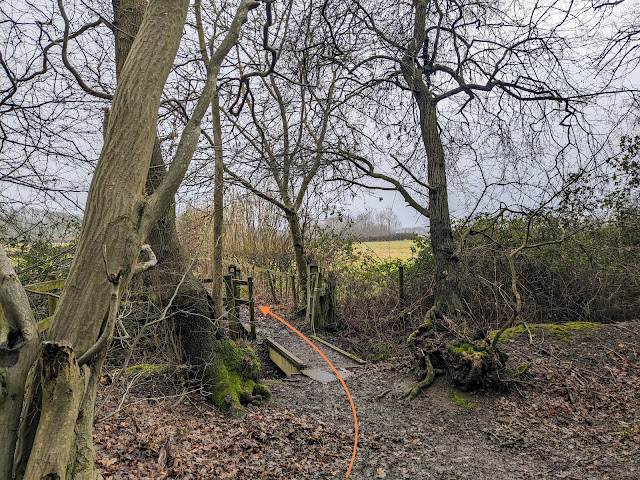
4:When you reach Spital Brook keep left then follow the path SW, with Spital Brook on your right, for 50m until you reach a gate leading to a
bridleway (location -
https://w3w.co/richer.mason.fried), see image below. This section will be muddy after rain.
 |
| Go through the gate then turn right on Brickendon Liberty bridleway 14 |
5: Go through the gate then turn right on Brickendon Liberty bridleway 14. When we revisited this walk in February 2024 Spital Brook was washing over the bridleway surface, see image below. We used our walking poles to keep our balance and managed to cross in boots. Wellies would have been better.
 |
| Spital Brook washing over Brickendon Liberty bridleway 14 |
Follow Brickendon Liberty bridleway 14 NW and uphill for 840m. This is a lovely path with the trees on either side creating a natural avenue.
 |
| Brickendon Liberty bridleway 14 heading NW |
Continue until you reach a fork in the path (location -
https://w3w.co/wisely.gather.hatch), see image below.
 |
| Turn right at the fork still on Brickendon Liberty bridleway 14 |
6: Turn right at the fork then continue on Brickendon Liberty bridleway 14 now heading N. As you make the turn look out for an information board on the right (location -
https://w3w.co/digits.wisely.often) which tells the story of a local woman who was killed by a
V1 'doodlebug' bomb in July 1944.
 |
| The information board about the 'doodlebug' |
Continue heading N on Brickendon Liberty bridleway 14 for 90m until you reach a lane (location -
https://w3w.co/store.double.drives), see image below.
 |
| Turn left on the lane |
7: Turn left on the lane then head in a westerly direction through Monks Green for 200m until the lane bends right (location -
https://w3w.co/menu.lands.slope). Here you leave the lane and continue heading W but now on a
footpath, see image below.
 |
| Head W on Brickendon Liberty footpath 10 |
8: Head W on Brickendon Liberty footpath 10. Continue for 75m until you reach a gate (location -
https://w3w.co/branch.relax.fade), see image below.
 |
| Follow Brickendon Liberty footpath 10 WSW |
Follow Brickendon Liberty footpath 10 WSW for 210m until you reach a gate on the left (location -
https://w3w.co/flats.abode.trades), see image below.
 |
| Turn left through the gate |
9: Turn left through the gate then follow Brickendon Liberty footpath 10 as it bends right then heads WSW for 50m to a field (location -
https://w3w.co/price.dime.notion), see image below.
 |
| Cross the field heading WSW, still on Brickendon Liberty footpath 10 |
10: Cross the field heading WSW, still on Brickendon Liberty footpath 10, for 150m until you reach a track (location -
https://w3w.co/towers.minute.sand), see image below.
 |
| Cross the track then continue on Brickendon Liberty footpath 10 |
11: Cross the track then continue on Brickendon Liberty footpath 10, still heading WSW, for 170m until you reach a junction (location -
https://w3w.co/jaws.digits.swung), see image below.
 |
| Go through the gate then head NW to the right of the pond |
12: Once through the gate cross Brickenden Liberty footpath 13 then head NW keeping to the right of the pond for 65m until you reach Brickendon Lane (location -
https://w3w.co/design.dive.speaks), see image below.
 |
| Head NW keeping to the right of the pond until you reach Brickendon Lane |
13: Turn left on Brickendon Lane then head in a south-westerly direction, passing the
The Chapel of the Holy Cross and St Alban on the right (location -
https://w3w.co/loud.tapes.beard), see image below.
 |
| The Chapel of the Holy Cross and St Alban, Brickendon |
Continue for 570m until you reach
The Farmers Boy pub/restaurant on the right (location -
https://w3w.co/spends.plus.liability), see image below.
 |
| Turn right immediately after The Farmers Boy |
14: Turn right immediately after The Farmers Boy then head N along Fanshaws Lane, which is also Brickendon Liberty BOAT (
byway open to all traffic) 7. Continue for 290m until the lane veers left (location -
https://w3w.co/body.voting.clock), see image below.
 |
| Continue straight heading N along Brickendon Liberty BOAT 7 |
15: When the lane veers left you continue straight taking the byway on the right. Head N for 1km along Brickendon Liberty BOAT 7 which is also known as Back Lane. You will walk through Sweeting's Wood then between fields until you reach cottages on your right and emerge on Brickendon Lane (location -
https://w3w.co/intro.kinds.usual).
16: Turn right then head SE along Brickendon Lane for 330m until you reach a track on your left (location -
https://w3w.co/today.cloth.trials), see image below. There isn't a pedestrian pavement along this stretch but there are verges where you can step aside to avoid traffic.
 |
| Turn left on Brickendon Liberty BOAT 8 |
17: Turn left on Brickendon Liberty BOAT 8 (location -
https://w3w.co/prove.reason.combining) then head SE for 280m until Brickendon Liberty BOAT 8 forks off to the right (location -
https://w3w.co/burn.change.intend), see image below.
.jpeg) |
| Follow Brickendon Liberty BOAT 8 as it forks to the right |
18: Follow Brickendon Liberty BOAT 8 as it forks to the right then continue heading SE for 190m until you reach a track on the left (location -
https://w3w.co/posts.almost.crowds), see image below. This section can be muddy after rain.
 |
| Turn left on Brickendon Liberty BOAT 9 |
19: Turn left on Brickendon Liberty BOAT 9 then head NE for 1.4km. This is a wonderful sheltered tree-lined path between which weaves its way between fields. Continue to Mangrove Road, which is also known, locally as Mangrove Lane (location -
https://w3w.co/cooks.flute.foam).
20: Turn left on the lane then head N for 185m until you reach a footpath on the right just before Brickendon Brook (location -
https://w3w.co/straw.send.strain), see image below.
 |
| Turn right on Brickendon Liberty footpath 5 |
21: Turn right on Brickendon Liberty footpath 5 then head SE across an arable field for 400m, see image below.
 |
| Head SE across an arable field on Brickendon Liberty footpath 5 |
22: After crossing the field you will reach the hedgerow (location -
https://w3w.co/shuts.galaxy.tips) where Brickendon Liberty footpath 5 bends left then heads NNE for 50m before bending right (location -
https://w3w.co/amuse.humble.duck). When we revisited this route in February 2024 a massive mound of what looked like steaming manure blocked our way with tractor tracks having churned up the public right of way so we had to navigate our way round it, see the orange arrow on the images below showing the direction of travel.
 |
| The route of Brickendon Liberty footpath 5 round the edge of the field |
.jpeg) |
| Brickendon Liberty footpath 5 heading ESE after the two bends |
23: Continue on Brickendon Liberty footpath 5, with the hedgerow on the right and now heading ESE, for 130m until the path bends sharp right (location -
https://w3w.co/hurt.woven.leave), see image below.
 |
| Turn right on Hertford Heath footpath 7 |
24: As you follow the path to the right you cross the parish boundary where the path you are on becomes Hertford Heath footpath 7. Follow it SSE for 20m until you reach the entrance to
Balls Wood, a Herts and Middlesex nature reserve on the left (location -
https://w3w.co/judges.media.sweep), see image below.
 |
| Turn left into Balls Wood |
Turn left into Balls Wood then follow a permissive path through the reserve weaving in a westerly direction for 460m until you exit the wood and rejoin Hertford Heath footpath 7 (location -
https://w3w.co/truly.glass.achieving), see image below.
 |
| Rejoin Hertford Heath footpath 7 then head E |
25: Rejoin Hertford Heath footpath 7 then head E for 220m until you cross a track (location -
https://w3w.co/bounty.sting.librarian). Continue for another 110m until you reach a junction (location -
https://w3w.co/insert.zest.ashes), see image below. This section can be extremely muddy.
 |
| Turn right on Ermine Street which is also Hertford Heath restricted byway 8 |
26: Turn right at the junction then head S along
Ermine Street, a Roman road, which is also known at this point as Hertford Heath restricted byway 8. Continue for 455m until the track becomes a path, crosses a parish boundary then becomes Brickendon Liberty restricted byway 24 (location -
https://w3w.co/fever.happy.stews), see image below.
 |
| Brickendon Liberty restricted byway 24 |
27: Continue heading S on Brickendon Liberty restricted byway 24 for 690m until you reach a lane (location -
https://w3w.co/punchy.tides.memo), see image below.
 |
| Cross the lane then continue heading S |
28: Cross the lane then head into
Broxbourne National Nature Reserve, still on Brickendon Liberty restricted byway 24 and still heading S. Do not stray from this path. The land to the right is private and not accessible to the public. Continue heading S for 710m until you reach Spital Brook (location -
https://w3w.co/sorters.this.stick), see image below.
 |
| Cross Spital Brook via the footbridge |
29: Cross Spital Brook via the footbridge then continue heading S, still on Brickendon Liberty restricted byway 24. Continue for 370m back to the car park at the start of the walk.
Interactive Map


.jpeg)


.jpeg)


Hello looks a great walk, how long does it take to complete?
ReplyDeleteHi,
DeleteThe route is 6.25 miles long, and there is a 4.2 mile detour, so it all depends which you take and how fast you walk. We walk about 3mph, so the main route would take us a little more than two hours. But if you are a slower walker, and want to linger and perhaps take pictures, I would allow three hours.
Hope you enjoy it.
David
Our group walked this on 13 July. Owing to shortage of time, we took the lane and footpath from points 9 to 12 which turned out to be a very pleasant diversion and a partial break from the many wooded areas on this walk. It was about 1 mile less than the full walk and required a bit of gardening on the footpath off the lane after point 9.
ReplyDeleteGlad you enjoyed it. Overgrown paths are a bit of a problem this time of the years. We always carry secateurs and a stick. Thanks for the feedback.
DeleteMy dog and I walked this route yesterday morning. It is such a quiet secluded walk, with plenty of shade which was appreciated in yesterdays hot sun. It took us 2 1/2 hours which included a couple of stops for a drink of water for us both.
ReplyDeleteSo glad you and your dog enjoyed it. It's a lovely walk. Thanks for the feedback. David
Delete