6 miles (9.5 km) with 103m total ascent
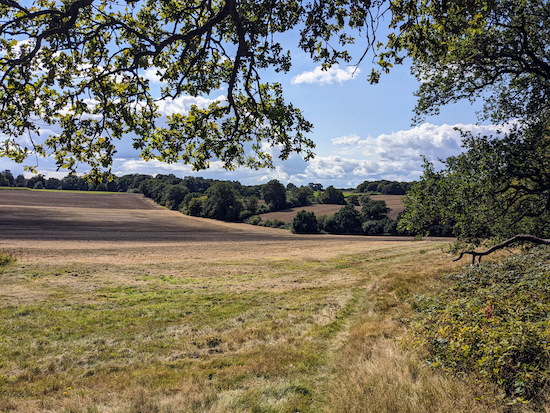 |
| The view SW from point 3 |
This walk passes through Hornbeam woodland, and follows a bridleway along a ridge that offers wide open views across southern Hertfordshire. It passes two remnants of WWII defences and the site of a Cold War nuclear bunker. The walk starts and finishes at The Woodman, Wildhill. There is a small amount of lane walking involved but the lanes are usually quiet with little traffic.
Please note that this route involves walking along a section of
The Hertfordshire Way which goes along Cucumber Lane where there is no pedestrian pavement. The lane has always been quiet on the dozens of times we have walked it but a user of Hertfordshire Walker has reported (October 2024) that it was busy when they walked the route. There is also a section of Grubbs Lane where there isn't a pedestrian pavement and which can be busy during rush hour. Walking groups or those walking with children might want to choose a different walk.
Getting there
There is a bus stop outside The Woodman which is served by the numbers 200 and 201 buses. You can check bus times at
Intalink.
Fly through preview of walk
If you want to check what sort of landscape you will be crossing before you set off on this walk you can view a short 3D video of the route below. It's created using the free version of Relive.
Directions
 |
Map for Walk 18: Tylers Causeway Loop
Click on the map above for a larger version
Created on Map Hub by Hertfordshire Walker
Elements © Thunderforest © OpenStreetMap contributors
There is an interactive map embedded at the end of these directions |
Those with GPS devices can download
GPX or
KML files for this walk. We've added
What3Words references for those who use that system. If you print these walks you might want to use the green
PrintFriendly icon at the bottom of these directions to delete elements such as photographs.
If you intend to take refreshments at The Woodman, Wildhill, before or after your walk they are happy for you to park in the pub car park. (location -
https://w3w.co/congratulations.trim.usual).
1: As you enter The Woodman car park head S with the beer garden on your left and the pub on your right then take the footpath just below the beer garden on the E side of the car park (location -
https://w3w.co/star.yard.oppose), see orange arrow on the image below.
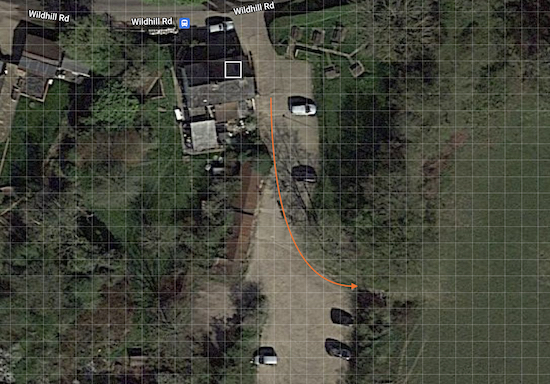 |
| The footpath is just below the beer garden, see orange arrow |
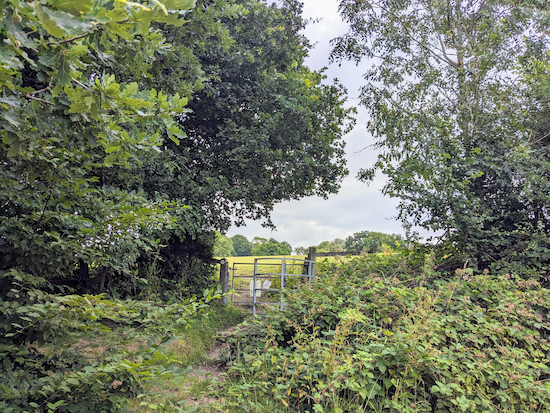 |
| Go through a metal gate then follow Hatfield footpath 85 |
Go through a metal gate then follow Hatfield footpath 85 uphill and diagonally SE across a field for 130m until you reach a gate in the hedgerow (location -
https://w3w.co/trials.shins.ever).
2: Go through the gate then head SSE across a field for 135m, still on Hatfield footpath 85, until you reach another gate at the edge of woodland (location -
https://w3w.co/pizza.began.sands), see image below.
 |
| Continue through the gate with the woodland on your left |
3: Continue through the gate then head SE, still on Hatfield footpath 85, with the woodland on your left for 145m until the path crosses the corner of a field for 125m then it goes through a gap in the hedgerow to reach the B158, (location -
https://w3w.co/tight.meal.puddles), see image below.
 |
| Hatfield footpath 85 cuts through the hedgerow |
4: Cross the road then turn left and walk NE along the E side of the B158 for 315m until you reach a footpath on the right at the point where Wildhill Road goes off to the left (location -
https://w3w.co/filed.author.dame), see image below.
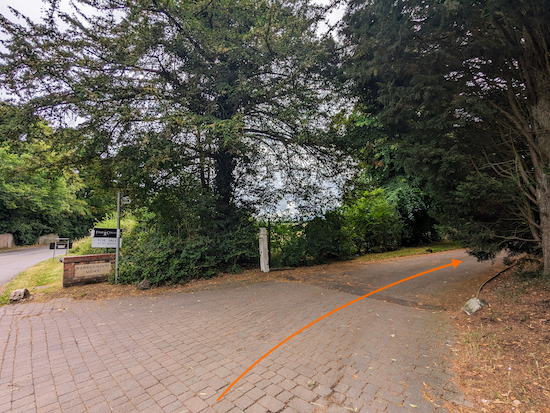 |
| Turn right along Essendon footpath 19 |
5: Turn right along Essendon footpath 19, which follows a private road heading SE for 140m before the footpath veers to the left (location -
https://w3w.co/ripe.tunes.pies), see image below.
 |
| Keep left and continue heading SE on Essendon footpath 19 |
Continue heading SE on Essendon footpath 19 for 70m until you reach a wooden footbridge and a gate on the left (location -
https://w3w.co/gender.splice.funny), see image below.
 |
| Go through the gate then head NE on Essendon footpath 20 |
6: Turn left then go through the gate and keep to the right heading NE. Follow Essendon footpath 20 with the woodland on your right and the field on your left. After 120m you will reach the end of the woodland where you drop down slightly to the right to go through a wooden gate by an outbuilding (location -
https://w3w.co/fields.blast.funded), see image below.
 |
| Go through the gate then continue on Essendon footpath 20 |
Turn right, go through the gate, then continue heading NE, now with the house and gardens on your right and the hedge on your left for 70m until you reach Hornbeam Lane.
7: Turn right on Hornbeam Lane, which is also Essendon bridleway 18, then head SW for 260m until Hornbeam Lane becomes a track (location -
https://w3w.co/globe.snaps.drape), see image below.
 |
| Continue along Essendon bridleway 18 |
8: Continue along Essendon bridleway 18 for 985m until you reach Cucumber Lane (location -
https://w3w.co/seated.seats.older).
 |
| Hornbeam Lane, Essendon bridleway 18 |
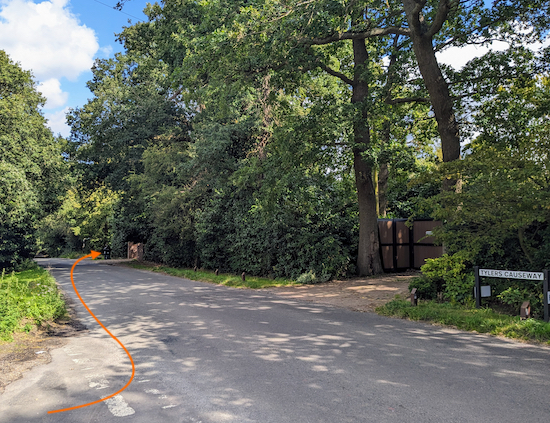
9: Turn right on Cucumber Lane then continue SE for 460m until you meet Tyler's Causeway (location -
https://w3w.co/bright.leaned.tags).
 |
| Turn left on Tylers Causeway |
10: Turn left on Tylers Causeway then walk E for 65m looking out for a byway on the right (location -
https://w3w.co/bulb.storm.traded)
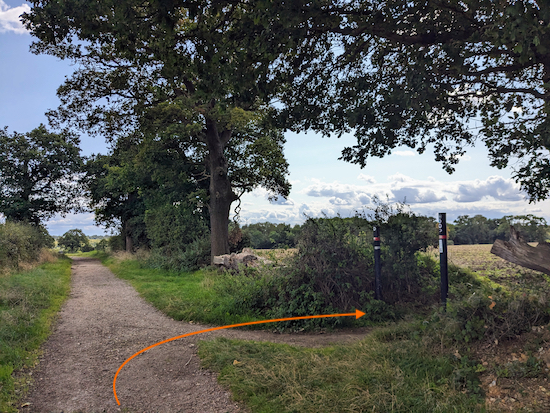
Turn right on Hatfield restricted byway 88, then head S for 380m until you reach a path on the right (location -
https://w3w.co/sector.script.panels), see image below.
 |
| Turn right on Hatfield bridleway 87 |
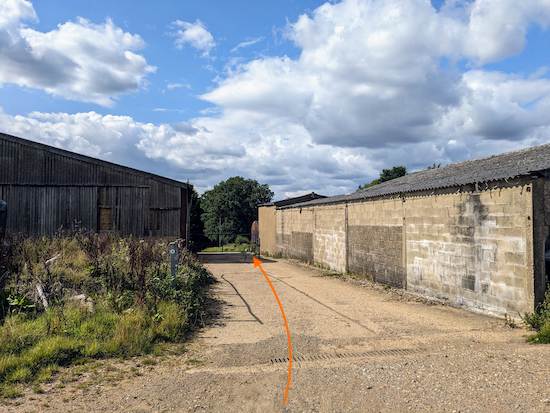
11: Turn right on Hatfield bridleway 87 then head W. After 1.3km you reach a farm (location -
https://w3w.co/empty.runner.happy), see image below.
 |
| Continue through the farmyard on Hatfield bridleway 87 |
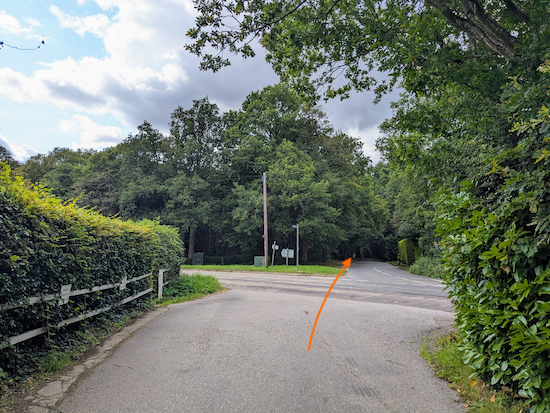
12: Continue through the farmyard heading W along Hatfield bridleway 87 (now a paved lane) for 1km to the B158 (location -
https://w3w.co/scout.slurs.retain), see image below.
 |
| Cross the B158 then head W along Grubbs Lane |
13: Cross the B158 then head W along Grubbs Lane for 220m walking on the footpath on the S side of the lane until you reach a footpath on the left (location -
https://w3w.co/spent.next.thus), see image below.
 |
| Turn left on Hatfield footpath 86 |
14: Turn left on Hatfield footpath 86 then head S for 530m where you will pass the remains of
a spigot mortar emplacement hidden in the hedgerow on the left (location -
https://w3w.co/tester.cones.scenes), a relic of WWII defences, see image below.
 |
The spigot mortar emplacement off Hatfield footpath 86
|
 |
The spigot mortar emplacement off Hatfield footpath 86
|
Continue heading S on Hatfield footpath 86 until you reach a footbridge (location -
https://w3w.co/moons.winks.carry).
 |
| Cross the footbridge then walk down the side of the transmitting station |
15: Cross the footbridge then head W down the side of the Brookmans Park Transmitting Station.
The Brookmans Park Transmitting Station was the first purpose-built twin transmitter station in the world capable of broadcasting two radio programmes simultaneously. During the Cold War that followed WWII the BBC drew up plans for a Wartime Broadcasting Service (WTBS) to be activated in the event of a nuclear attack. A bunker, built underneath the Brookmans Park Transmitting Station, was one of 11 sites around the country. The twin-wave broadcasting facility was considered to be a crucial part of the nation’s communications strategy in the event of nuclear war.
Continue for 405m until you reach the A1000 (location -
https://w3w.co/crib.boxing.trip).
16: Cross the A1000 then walk N for 100m until you reach Bell Lane on your left (location -
https://w3w.co/pipe.slides.cross), see image below.
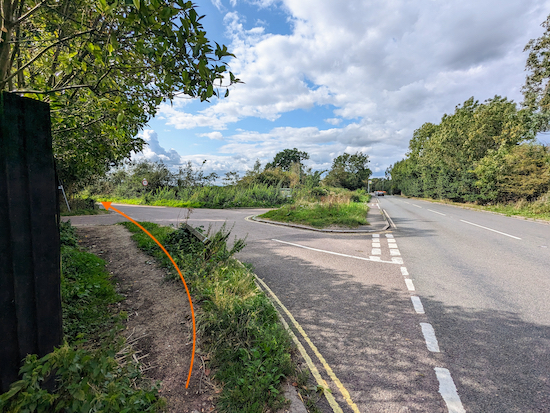 |
| Turn left on Bell Lane then head WSW |
17: Turn left on Bell Lane then head WSW for 300m until Bell Lane bends right. This area is known as Bell Bar.
In 1756 Bell Bar was a bustling staging post on the Great North Road, with four inns and alehouses dotted around the hamlet. The route was one of the main thoroughfares for travellers on horseback or on stage coaches making their way between London and the north.
18: Continue along Bell Lane, now heading N, for 450m to a crossroads opposite the petrol station (location -
https://w3w.co/loans.moons.wipes).
At this point, if you need refreshments, you have three options. The garage opposite has a shop or you could turn right then head SE along the Great North Road for 150m to visit The Cock o' The North pub/restaurant (location - https://w3w.co/clean.level.peanut), or, if you are looking for a cafe, The Dutch Marketplace (location - https://w3w.co/upset.foods.crib) is 150m further on the opposite side of the road. They also have a deli if you want snacks and toilets for customers (please check opening times).
19: Cross the A1000 then take the footpath on the corner of the junction with Woodside Lane (location -
https://w3w.co/stored.crisis.barks), see image below.
 |
| Turn right on North Mymms footpath 66 |
Turn right on North Mymms footpath 66 then head NE across an arable field for 160m until you reach a copse (location -
https://w3w.co/caged.sobs.body). On your left you will see the remains of a
Tett turret on the left as you pass through the copse (location -
https://w3w.co/risky.hang.storms), see image below.
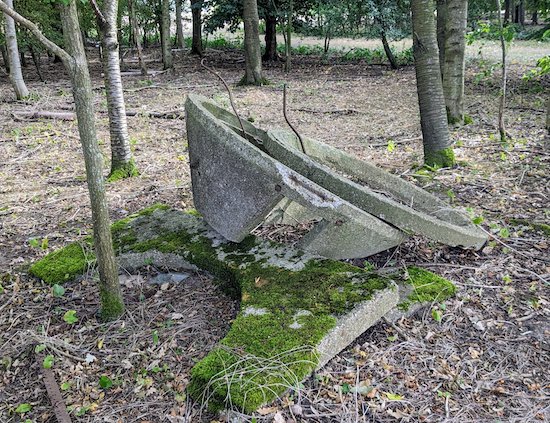 |
| The remains of a WWII Tett turret |
After the copse head NE across an arable field, now on Hatfield footpath 83, see image below.
 |
| Continue on Hatfield footpath 83 across an arable field |
Continue across an arable field for 330m until you reach a footbridge in the hedgerow (location -
https://w3w.co/mining.ruled.sums).
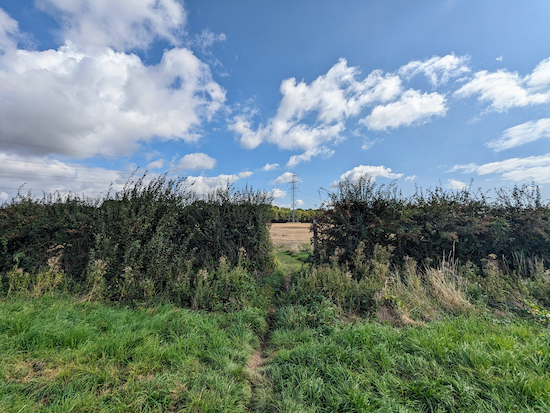 |
| Cross the footbridge then continue on Hatfield footpath 83 |
20: Cross the footbridge then continue on Hatfield footpath 83 crossing another arable field, see image below.
 |
| Head NE across the arable field on Hatfield footpath 83 |
Head NE across the arable field, still on Hatfield footpath 83, for 225m until you reach Grubbs Lane (location -
https://w3w.co/long.train.glitz).
21: Turn left on Grubbs Lane and head NW for 90m before taking a footpath on your right (location -
https://w3w.co/movies.begun.sadly), see image below.
 |
| Turn right on Hatfield footpath 84 |
Turn right on Hatfield footpath 84 then follow it NNE across an arable field.
 |
| Continue for 280m until you reach a gap in the hedgerow |
Continue for 280m until you reach a gap in the hedgerow (location -
https://w3w.co/frosted.hurls.scam), see image below.
 |
| Go through the gap then head NNE downhill |
22: Go through the gap then follow Hatfield footpath 84 NNE downhill and through the crop for 120m until you reach the hedgerow (location -
https://w3w.co/error.poem.mild), see image below.
 |
| Turn right when you reach the hedgerow |
Turn right when you reach the hedgerow then head NE, still on Hatfield footpath 84, with the hedgerow on your left and the field on your right until you reach a gap in the hedgerow to your right (location -
https://w3w.co/curvy.golf.path), see image below.
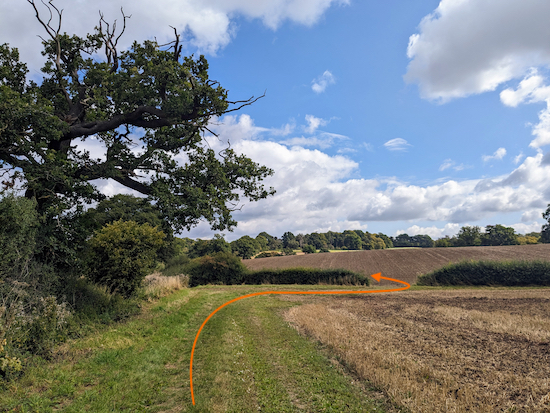 |
| Go through the gap then turn left |
23: Go through the gap then turn left and follow Hatfield footpath 84 round with the hedgerow on your left and the field on your right for 200m until you reach a gate on the left (location -
https://w3w.co/moved.analogy.sunk), see image below.
 |
| Turn left through a gate then follow Hatfield footpath 84 NE |
24: Turn left through a gate then follow Hatfield footpath 84 NE crossing a footbridge then follow the path for 280m as it passes through another gate, across another footbridge, and a final gate before reaching The Woodman car park.
Interactive Map


The numbering is reversed in the interactive map (clockwise) compared to the static directions map (anticlockwise). The written guidance follows the interactive map (clockwise route).
ReplyDeleteHi Andrew,
DeleteWow, thanks for pointing that out. I know how that happened. We made an adjustment to the route and I forgot to change the map. So grateful to you for letting me know. I have just edited the directions and changed the maps (both static and interactive). Great to have your feedback.
Thanks again
David
No problem, David. I wouldn't have noticed other than I was working out whether to park at the start or point 3. Thanks for harmonising the maps.
DeleteThe walks on this site have given us hours of great walking this year. As the available daylight lengthens we've progressed from 4-milers to 6+. So a big thank you for all your hard work routing, posting and maintaining the walks.
Hi Andrew,
DeleteI really appreciate the feedback. It all helps me ensure the walks are accurate. So glad you are enjoying the walks. We love mapping them, and get great pleasure out of knowing others are enjoying them, too.
David
This was a perfect Mothering Sunday walk with a 6 and 8 year old who managed it with little complaint since it's pretty flat. Despite the glorius weather, we saw very few people and felt wonderfully far from civilisation for most if it. We started and ended at the Cock of the North and the transmitter made for a very interesting and eerie finale. For anyone doing it in the next couple of days, be warned that stage 6-7 currently has mud impassable unless in wellies (plus a couple of stressfully yappy dogs in the adjacent garden!) Thank you so much as always for your generous contribution to to enjoyment of others.
ReplyDeleteWhat a lovely comment. Thanks for the feedback. That stretch alongside the house with the barking dogs is always muddy. But despite that it's good to know that the children enjoyed it.
Delete